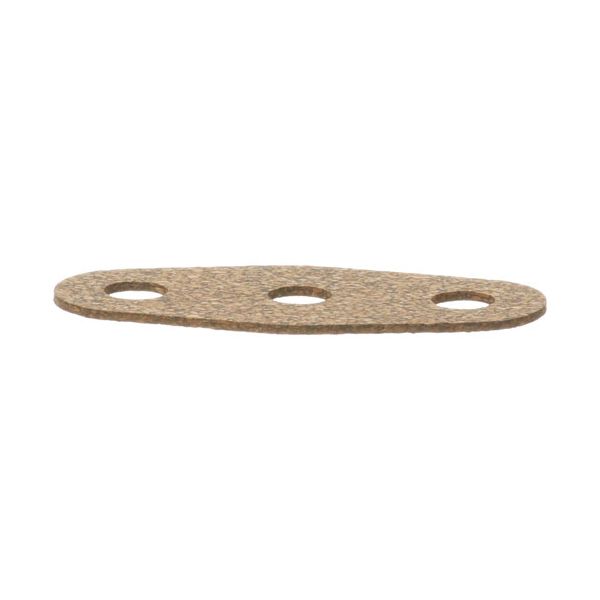
Hobart 00-119051 Dishwasher Drain Hole Gasket Pump Brown 2 1/4" x 1" 1/4" ID

CAD$6.79
In stock
SKU
00-119051
Manufacturer:
The Hobart 00-119051 Dishwasher Drain Hole Gasket Pump Brown 2 1/4 x 1" 1/4 ID is a sealing part that is utilised in commercial applications. It is placed on the pump or drain hole to form a water-tight seal between the connected components and avoid leakages during wash and drain cycles. It is used as a component of the pump and drainage system, whereby it maintains water containment and flow control. In commercial kitchens, it is useful for sustaining use in repetitive operations. During maintenance, the gasket is checked and changed if leakage is noticed.

Dimensions

  • Length: 5 In
  • Width: 3 In
  • Height: 0.25 In
  • Weight: 0.005 lbs
https://partsfe.com/media/catalog/product/h/o/hobart-00-119051-brown-pump-drain-hole-gasket-2-1-4-x-1-1-4-id-75769-2.jpg

Product Notes

  • Color: Brown
  • Material: Cork
  • Length: 2 1/4" | 57 mm
  • Width: 1" | 25 mm
  • Inner Diameter: 1/4" | 6 mm
  • Centers: 3/4" | 19 mm
Write Your Own Review
You're reviewing:Hobart 00-119051 Dishwasher Drain Hole Gasket Pump Brown 2 1/4" x 1" 1/4" ID
Your Rating
Customer Questions
No Questions

We strive to provide our customers with a hassle-free and efficient shopping experience. Our shipping policy ensures the timely delivery of your orders and complete customer satisfaction. View More

We are committed to ensuring your complete satisfaction with every purchase. We understand that circumstances may arise where you must return a product or request a refund. If for any reason you are not satisfied, you may return the item(s) according to the terms outlined below. View More

This Payment Policy outlines the terms and conditions governing all payments made for products purchased through our website. By making a purchase, you agree to be bound by this Payment Policy. View More

Installation Steps

Step1: Turn off the appliance and unplug the pump system.

Step2: Remove the old gasket from the drain hole carefully.

Step3: Clean the surrounding area to ensure proper sealing.

Step4: Position the new gasket into the drain hole, aligning evenly.

Step5: Reassemble components, restore power, and check for leaks.