Lincoln Impinger Pizza Oven Troubleshooting Made Easy: Step-by-Step Fixes
The Lincoln Impinger pizza oven is a popular choice for commercial pizzerias, delivering fast and consistent results. However, like any piece of equipment, it can occasionally run into issues that hinder performance. Whether you're experiencing uneven cooking, temperature inconsistencies, or error codes, troubleshooting your Lincoln Impinger and finding the right Lincoln parts doesn’t have to be a daunting task. With the right approach, many common problems can be easily diagnosed and fixed. In this guide, we’ll walk you through a series of simple, step-by-step solutions to get your pizza oven back in action quickly. Whether you’re a seasoned professional or a restaurant owner, these tips will help ensure your oven runs smoothly and efficiently, so you can focus on serving perfect pizzas every time.
Understanding How a Lincoln Impinger Pizza Oven Works
The Lincoln Impinger pizza oven is a highly efficient, fast-cooking appliance designed for high-volume kitchens. By using impinged air and infrared heating elements, it ensures even cooking and reduced bake times. To keep your oven operating at its peak efficiency and diagnose any possible problems, it is essential to understand how it operates.
-
Impinged Air Technology: The oven uses a high-velocity stream of hot air that circulates the food. The pizza cooks faster and more evenly due to the improved heat transfer caused by the impinged air.
-
Infrared Heating Elements: These heating elements help generate consistent and intense heat, ensuring your pizzas cook quickly without losing quality.
-
Faster Cooking Times: The combination of impinged air and infrared heat reduces cooking time significantly, which is crucial for fast-paced kitchen environments.
-
High-Demand Environments: Lincoln Impinger ovens are designed for high-volume kitchens, offering speed and consistency to meet the demands of busy foodservice operations.
-
Conveyor Belt Models: Some Lincoln Impinger ovens come with a conveyor belt, which allows for automated baking. This enables operators to continuously load pizzas, reducing labor and increasing throughput.
-
Versatility: Lincoln Impinger ovens can bake various foods beyond pizza, like sandwiches and pastries. This versatility makes them suitable for diverse kitchen menus.
-
Space-Saving Design: Many models feature compact designs ideal for kitchens with limited space. Despite their size, they still offer high-volume cooking capacity.
-
Quick Recovery Time: Lincoln pizza ovens quickly return to the desired temperature after loading. This minimizes downtime and maximizes kitchen productivity.
-
Reduced Cooking Odors: Impinged air and infrared heating reduce lingering cooking odors. This keeps the kitchen environment more pleasant for staff and customers.
-
Advanced Control Systems: For accurate temperature and time adjustments, several versions come with digital control systems. This ensures consistent, customized results for each pizza.
Looking for high-quality parts to keep your Lincoln Impinger pizza oven running smoothly? PartsFeCA offers a wide selection of genuine components like heating elements, conveyor belts, thermostats, ignitors, and blower motors from trusted brands like Lincoln, Blodgett, and Bakers Pride. Whether you need a replacement, PartsFeCA has you covered.
Signs Your Lincoln Impinger Oven Needs Troubleshooting
Identifying early warning signs can help prevent significant breakdowns. Here are some common indicators that your Lincoln Impinger pizza oven parts may need troubleshooting:
-
Uneven Cooking: Parts of the pizza cook unevenly due to issues with heating elements, airflow, or the conveyor system.
-
Longer Cooking Times: Extended cooking times may indicate problems with the thermostat, heating elements, or restricted airflow.
-
Inconsistent Temperature: A malfunctioning thermostat or a broken temperature sensor may be the cause of fluctuating oven temperatures.
-
Strange Noises: Grinding or banging sounds usually point to worn-out motors, belts, or internal mechanical parts.
-
Odors or Smoke: Unusual smells or smoke typically result from grease or food debris buildup inside the oven.
-
Visible Damage: Cracked seals, rust, or worn components are visible signs the oven needs repair or part replacement.
-
Control Panel Malfunctions: If buttons don’t respond or settings reset unexpectedly, the control panel or wiring may be faulty.
-
Conveyor Belt Not Moving: A stuck or non-moving conveyor belt can be caused by a worn motor, a broken belt, or an electrical issue.
-
Frequent Power Cycling: If the oven frequently turns off and on by itself, it may indicate an issue with the power supply or internal circuitry.
-
Poor Crust Texture: If pizzas come out soggy or over-crisped, it could be due to incorrect airflow or uneven heat distribution.
-
Overheating: An oven that overheats and shuts down may have a faulty thermostat, blocked vents, or failed fan systems.
-
Unusual Display Errors: Error codes or flashing lights on the display often indicate a specific internal fault that requires attention.
Identifying these signs early helps prevent major breakdowns. Timely Lincoln pizza oven troubleshooting keeps your oven running efficiently.
Check out our detailed guide on how to fix a broken heating element in a commercial oven to help you avoid costly repairs.
Step-by-Step Fixes for Common Lincoln Impinger Oven Issues
Several typical oven problems can be fixed with just a few straightforward steps. Using the right Lincoln Impinger parts ensures lasting repairs and smooth operation. Follow these step-by-step fixes to keep your oven running strong.
Uneven Cooking
Uneven cooking usually indicates a problem with airflow or temperature regulation.
Troubleshooting Steps:
Step 1: Check the Airflow
Ensure that the impinged air system is functioning correctly. Clear any accumulation or obstructions from the fans and air intake vents.
-
Remove any food particles, grease, or dust from the vents.
-
To clean fan blades that are difficult to reach, use compressed air.
-
Verify that nothing is obstructing the oven's ventilation.
Step 2: Examine the Conveyor Belt
Look for any damage or misalignment on the conveyor belt. It could need to be adjusted or replaced if the belt is distorted or the speed fluctuates.
-
Check for uneven movement or warping of the belt.
-
Verify that the belt is positioned correctly on the rollers.
-
Tighten or loosen the belt according to the manufacturer's specs.
Step 3: Calibrate the Temperature.
Make sure that the oven's internal temperature is the same by using a thermometer.
-
Place an oven-safe thermometer on the belt and monitor heat levels.
-
Compare thermometer readings with the digital control panel.
-
If necessary, replace or recalibrate the thermostat.
Temperature Fluctuations
Temperature fluctuations can result from a faulty thermostat, damaged sensors, or poor airflow.
Troubleshooting Steps:
Step 1: Clean the Heating Elements
Uneven heating may result from dirt and grease accumulation on the heating element
-
After turning off the oven, let it cool fully.
-
To clean the elements, use a gentle cloth and a light detergent.
-
Avoid using harsh chemicals that may damage components.
Step 2: Inspect the Thermostat
A malfunctioning thermostat may prevent the oven from maintaining a steady temperature.
-
Use a multimeter to test thermostat continuity.
-
Replace if readings are outside the normal resistance range.
-
Check thermostat wiring for signs of damage or corrosion
Step 3: Check for Faulty Wiring
Loose or damaged wires can cause temperature drops or spikes.
-
Inspect all wiring connections inside the control panel.
-
Look for burned or frayed wires and replace as necessary.
-
Secure loose connections with proper terminals or wire nuts.
Conveyor Belt Problems
A malfunctioning conveyor belt can be due to wear, misalignment, or a broken motor.
Troubleshooting Steps:
Step 1: Check the Belt Tension:
Improper tension can prevent the conveyor belt from moving smoothly.
-
Refer to the oven’s manual for proper tension specifications.
-
Use a tension gauge or manual pressure test.
-
Adjust belt tensioners if necessary.
Step 2: Inspect the Motor
A damaged or faulty motor could be the cause of belt failure.
-
Look for odd noises coming from the motor..
-
To check for electrical continuity, use a multimeter..
-
Replace the motor if it fails diagnostic tests.
Step 3: Clean the Belt and Rollers
Debris buildup can create friction and slow down or stop the belt.
-
Remove crumbs, grease, and residue from rollers and belt.
-
Use a degreaser that’s safe for food-service equipment.
-
Lubricate roller bearings (if recommended by the manufacturer).
Fixing Error Codes or Warning Lights
Warnings or error codes, often indicated by lights, typically signal issues with the oven's electrical components, control board, or sensors.
Troubleshooting Steps:
Step 1: Reset the Oven
A simple reset can fix a lot of problem codes.
-
Power down the oven completely and unplug it.
-
Wait at least 60 seconds before restarting.
-
Observe if the error returns after rebooting.
Step 2: Identify the Specific Issue
Consult the oven’s manual to match the code with a specific fault.
-
For airflow-related codes, check fans and air filters.
-
For heat-related codes, inspect thermostats and heating elements.
-
For conveyor codes, look into motor function and belt alignment.
Fixing No Heat
No heat in the oven can be caused by a malfunctioning heating element, thermostat, or electrical connection.
Troubleshooting Steps:
Step 1: Inspect the Heating Elements
The elements might be disconnected or burned out if there is no heat.
-
Examine components visually for cracks or dark areas.
-
Use a multimeter to check for continuity.
-
Replace defective elements with OEM (original equipment manufacturer) parts
Step 2: Check the Power Supply
This could be due to a malfunctioning or unplugged power source.
-
Make sure the oven is turned on and plugged in firmly.
-
Test the outlet for voltage using a voltmeter.
-
Inspect circuit breakers or fuses and reset/replace as needed.
Step 3: Test the Thermostat
A broken thermostat can stop the oven from heating entirely.
-
Remove the thermostat panel and disconnect the wires.
-
Use a multimeter to check for constant resistance.
-
If the continuity test is unsuccessful, replace it.
When to Replace vs. Repair Lincoln Impinger Parts
Choosing between repairing and replacing Lincoln parts can help you avoid unnecessary costs and downtime. Use this guide to decide the most effective solution for typical oven problems.
|
Parts |
When to Repair |
When to Replace |
|
Heating Elements |
Cleaning or adjusting can typically fix minor cracks or erratic problems. |
If the element is completely burned out or severely damaged beyond repair, it must be replaced. |
|
Conveyor Belt |
Minor misalignments or small obstructions can be cleared and repaired if the belt is not torn. |
If the conveyor belt is severely worn, cracked, or stretched, a new one will be needed. |
|
Thermostat |
If the thermostat is giving inaccurate readings but is still functional, recalibration or cleaning might resolve the issue. |
If the thermostat is non-functional, constantly fluctuating, or damaged, it should be replaced. |
|
Control Panel |
If buttons are sticky or unresponsive, cleaning or simple repairs can often fix the problem. |
It is advised to replace the control panel if it is completely non-responsive or has significant internal damage. |
|
Motors and Fans |
Minor issues with motor noise or slow speed can sometimes be addressed with lubrication or minor repairs. |
If the motor is completely dead or the fan blades are cracked or broken, replacement is needed. |
|
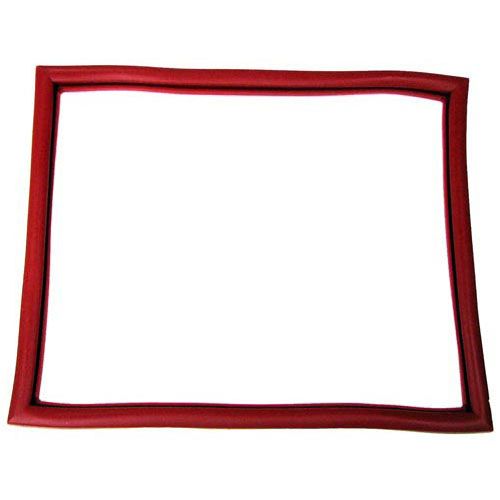
Seals and Gaskets |
Small gaps or wear on seals can sometimes be fixed by cleaning and resealing. |
If seals are cracked, broken, or worn to the point of not creating a proper seal, they should be replaced. |
Knowing when to repair or replace Lincoln pizza oven repair parts helps maintain efficiency and extend the lifespan of your equipment.
Check out our guide on how to replace your oven thermostat to ensure your oven operates at its best and avoid unnecessary repairs.
Preventive Maintenance Tips to Avoid Future Breakdowns
Regular maintenance is essential to extend the life of your Lincoln parts and avoid unexpected repairs. Here are some maintenance tips:
-
Check Seals: Check door seals regularly for cracks or wear that can lead to heat loss. Replace broken seals to avoid uneven cooking and energy loss.
-
Lubricate Moving Parts: Lubricate the conveyor belt system, motors, and other moving parts for smooth operation. This improves the oven's lifespan and prevents wear and tear.
-
Clean Regularly: Grease accumulation, which can compromise performance and safety, is avoided with routine cleaning. Clean air vents, heating elements, and conveyor belts frequently.
-
Monitor Temperature: Periodically check the oven’s temperature with an oven thermometer. Ensuring it’s at the correct setting helps maintain consistent cooking results.
-
Schedule Professional Inspections: Schedule routine professional inspections to detect issues early. Identify issues before they become serious to avoid expensive repairs.
Check out our detailed guide on how to clean your Turbochef oven for expert tips and step-by-step instructions.
In conclusion, Routine maintenance and timely troubleshooting are necessary to maximize the performance and lifespan of your Lincoln Impinger pizza oven. By recognizing early warning signs and knowing when to repair or replace key components, you can prevent costly breakdowns and ensure consistent cooking results. Relying on genuine Lincoln parts not only guarantees compatibility but also helps maintain the oven’s efficiency, keeping your kitchen running smoothly and your pizzas perfectly baked every time.
FAQs
How do I reset the Lincoln Impinger oven?
To reset the oven, turn off the power, wait 30 seconds, then turn it back on. If needed, press the reset button located near the control panel.
What is the temperature of the Lincoln Impinger pizza oven?
Lincoln Impinger ovens typically operate between 200°F to 600°F. Most pizzas cook best around 475°F to 525°F for optimal results.
Why would a Lincoln pizza oven not cycle its heat after replacing all the electric heating elements?
If the oven isn't cycling heat, the issue could be a faulty thermostat, improper wiring, or a malfunctioning control board. Double-check connections and consider testing the thermostat or control components.