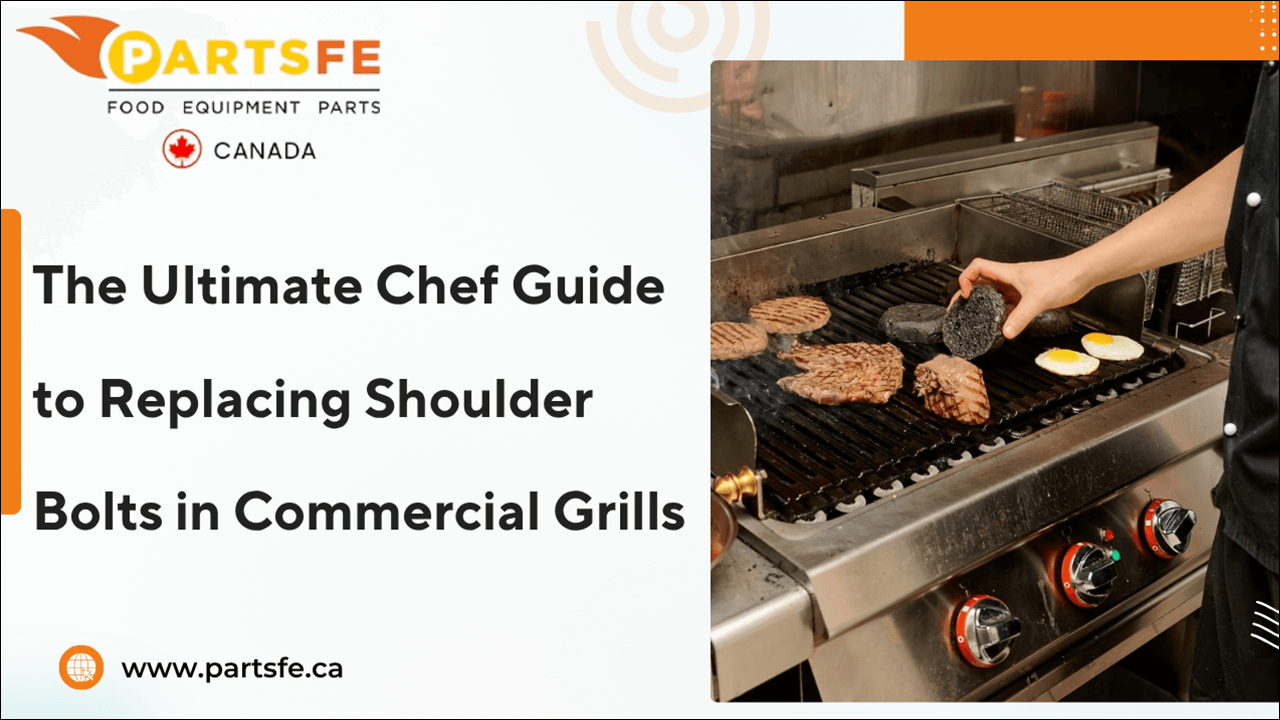
The Ultimate Chef Guide to Replacing Shoulder Bolts in Commercial Grills
In a commercial kitchen, precision and reliability are essential, not just in cooking but in maintaining the equipment chefs rely on daily. Shoulder bolts, often found in hinges, grates, and rotating assemblies, play a vital role in keeping commercial grills operating smoothly. Over time and with regular use, these components should be replaced as part of standard maintenance to ensure consistent performance and safety. This guide is designed specifically for chefs and kitchen staff who want to take a hands-on approach to grill upkeep. You’ll learn how to properly remove and replace shoulder bolts using the right tools and techniques, no guesswork, no troubleshooting, just clear, practical steps to keep your grill in peak condition and your kitchen running efficiently.
Common Signs Your Shoulder Bolts Need Replacing
Commercial shoulder bolts are crucial for your grill’s performance. Keep an eye out for these unmistakable signs that signal it’s time to replace it:
-
Loose or Wobbly Grill Parts: Noticeable instability or movement in grates or hinges is a sign your shoulder bolts need attention.
-
Visible Rust or Corrosion: Rust or corrosion on hinge shoulder bolts is a clear visual indicator that they are wearing out and need replacement.
-
Stripped or Damaged Threads: Threads that look worn or stripped are a sign that the bolt no longer secures parts properly.
-
Increased Friction or Stiffness: A noticeable stiffness or resistance when moving grill parts indicates worn shoulder bolts.
-
Bolts Frequently Loosening: If bolts keep coming loose and need re-tightening, that’s a sign they’re failing.
-
Misaligned Grill Components: Parts like lids or hinges that don’t line up correctly signal shoulder bolt wear.
-
Cracks or Fractures Near Bolts: Visible cracks around bolt holes are a sign of excessive stress from failing bolts.
-
Bent or Warped Bolts: Visible bending or warping of bolts is a clear sign that they need replacement.
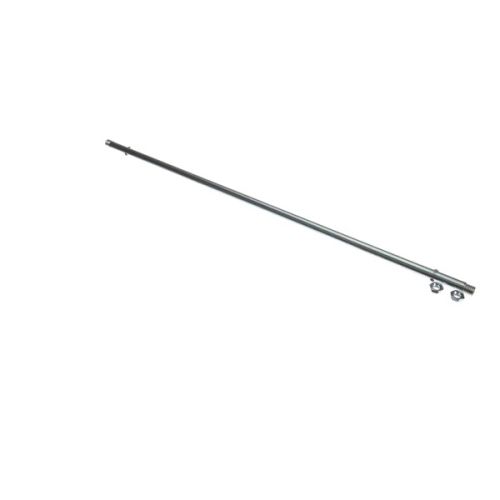
Looking for high-quality shoulder bolts and replacement parts for your commercial grill? PartsFeCA offers high-quality shoulder bolts, spring lever shoulder bolts, grill hinges, burner tubes, and drip pans from leading brands like Garland, Cleveland, and Vulcan to keep your equipment running smoothly.
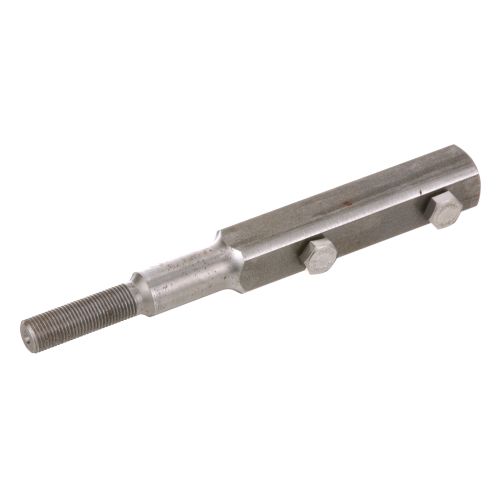
Choosing the Right Shoulder Bolts for Commercial Grills
Selecting the right commercial grill shoulder bolts is essential for performance and safety. Properly fitting, durable bolts prevent damage and ensure smooth, reliable operation.
When choosing shoulder bolts for commercial grills, consider these important aspects:
-
Material Quality: Opt for stainless steel or heat-resistant alloys to withstand high temperatures and resist corrosion caused by grease and moisture.
-
Shoulder Diameter and Length: Ensure the shoulder diameter and length fit precisely with your grill’s components to maintain proper alignment and smooth movement.
-
Thread Size and Pitch: Match the thread size and pitch exactly to the original bolts to ensure secure fastening without damaging the threads.
-
Load Capacity: Select bolts rated for the mechanical load and stress typical in commercial grill usage to avoid premature failure.
-
Finish and Coating: Choose bolts with protective coatings like zinc plating or black oxide to extend bolt lifespan and resist rust.
-
Brand Compatibility: Whenever possible, choose bolts recommended by the manufacturer to guarantee an exact fit and the best performance.
Properly chosen shoulder bolts improve grill reliability, safety, and longevity, making your kitchen operations more efficient and hassle-free.
Tools and Materials Needed to Replace Commercial Grill Shoulder Bolts
Replacing shoulder bolts in commercial grills requires specific tools and materials to ensure the job is done correctly and safely. Having these tools ready in advance speeds up the procedure and prevents equipment damage.
Here’s a list of the real tools and materials you’ll need:
-
Ratchet Wrench with Socket Set: For loosening and tightening bolts, typically metric or SAE sockets depending on bolt specs.
-
Allen Wrenches (Hex Keys): Often required for hex-head shoulder bolts, sizes may vary from 3mm to 8mm.
-
Shoulder Bolt Kit: Consider a shoulder bolt kit with multiple sizes and grades for easy replacement.
-
Torque Wrench: To prevent overtightening, make sure bolts are tightened to the torque settings advised by the manufacturer.
-
Penetrating Oil (e.g., WD-40): Helps loosen rusted or seized bolts for easier removal.
-
Wire Brush or Nylon Brush: Cleans bolt holes and surfaces before installing new bolts to ensure proper fit.
-
Thread Locker (Medium Strength, like Loctite Blue): Prevents bolts from loosening under heat and vibration.
-
Use Heat-Resistant Gloves: Keep your hands away from hot parts and sharp edges.
-
Wear Safety Goggles: Protect eyes from debris or accidental contact while working.
-
Cleaning Rags: For wiping grease, dirt, and excess lubricant.
Having these real tools and materials ready guarantees a smoother, safer shoulder bolt replacement process, keeping your commercial grill in optimal working condition.
Safety Considerations When Replacing Grill Hardware
Replacing grill hardware, including shoulder bolts, requires careful attention to safety to prevent injuries and equipment damage. Following proper safety practices ensures a smooth and secure maintenance process in busy commercial kitchens.
Key safety considerations to keep in mind:
-
Shut Off Gas Supply and Power: Always turn off the gas valve and unplug electrical grills before starting any repairs to prevent leaks or electric shocks.
-
Wait for Complete Cooling: Allow the grill and its parts to cool fully, as even residual heat can cause serious burns.
-
Use Proper Lifting Techniques: Some grill components can be heavy; lift with your legs, not your back, to avoid injury.
-
Ensure Stable Work Surface: Work on a stable, flat surface to prevent tools or grill parts from slipping or falling.
-
Ventilate the Work Area: Work near open windows or with exhaust fans on to reduce exposure to fumes from grease, cleaners, or lubricants.
-
Maintain a Clean Workspace: Remove grease buildup and clutter to prevent slips and ensure clear visibility.
-
Follow Manufacturer’s Specs: Use the exact replacement parts and torque settings specified to prevent hardware failure or safety hazards.
-
Check for Gas Leaks Post-Repair: After reassembly, test for leaks with a soap solution to ensure safe operation.
-
Handle Shoulder Screws Grill Carefully: Use proper tools to avoid damaging threads or nearby components.
By giving these safety precautions first priority, you safeguard yourself and keep your commercial grill dependable and long-lasting.
Step-by-Step Process to Replace Shoulder Bolts in Commercial Grills
Replacing shoulder bolts in commercial grills is vital to ensure safety and optimal performance. Use this step-by-step guide to complete the replacement process efficiently and correctly.
Step 1: Turn Off and Disconnect the Grill
Before starting, switch off the grill and disconnect it from the gas supply or power source to avoid accidents.
Step 2: Allow the Grill to Cool Completely
Wait until the grill and all components are cool to prevent burns or injuries during maintenance.
Step 3: Remove Grill Components
Carefully remove any parts obstructing access to the shoulder bolts, such as grates, burners, or panels, using the appropriate tools.
Step 4: Apply Penetrating Oil
Spray penetrating oil on the shoulder bolts to loosen rust or debris, allowing for easier removal.
Step 5: Loosen and Remove Old Shoulder Bolts
Use the correct size socket or Allen wrench to unscrew the bolts. Keep track of any washers or spacers.
Step 6: Clean Bolt Holes and Surrounding Areas
Use a wire brush and cleaning cloth to remove rust, grease, and debris from the bolt holes and surrounding surfaces.
Step 7: Prepare Replacement Shoulder Bolts
Confirm the new bolts match size, thread pitch, and material specifications for proper bolt replacements and grill maintenance. Apply thread locker if recommended.
Step 8: Install New Shoulder Bolts
To ensure proper alignment, insert and hand-tighten the replacement bolts first, then use a torque wrench to tighten them to the manufacturer’s recommended torque settings.
Step 9: Reassemble Grill Components
Replace all removed parts securely, ensuring everything fits and moves smoothly.
Step 10: Test the Grill
Reconnect the power or gas, and test the grill to ensure the new shoulder bolts are functioning properly without any unusual movement or noise.
By following these steps, you can keep your commercial grill reliable and safe, reducing downtime and avoiding expensive repairs.
Check out this guide on how to replace commercial grill hood filters for a replacement process that helps keep your grill in optimal working condition.
Preventive Maintenance Tips to Extend Bolt Life in Commercial Grills
Proper preventive maintenance is crucial for extending the life of commercial grill bolts in minimizing downtime, and avoiding costly repairs. Follow these real-world tips to keep your grill hardware durable and reliable:
-
Clean Bolts and Surrounding Areas Weekly: Use a food-safe degreaser and nylon brush to remove grease, food particles, and moisture that promote rust and corrosion.
-
Inspect Bolts Monthly for Wear and Looseness: Check for signs of corrosion, stripped threads, or movement, and tighten or replace bolts as needed.
-
Apply High-Temperature Anti-Seize Lubricant: For simpler removal in the future, apply food-grade anti-seize chemicals to BBQ shoulder bolts to stop galling.
-
Follow Manufacturer’s Torque Specifications: Always use a torque wrench to tighten bolts to recommended levels, preventing over-tightening that can strip threads or under-tightening that causes loosening.
-
Use Stainless Steel or Zinc-Plated Bolts: Opt for corrosion-resistant materials that withstand heat, grease, and humidity typical in commercial kitchens.
-
Protect Bolts from Direct Flame Exposure: Ensure bolts are positioned or shielded to avoid constant direct heat, which can accelerate wear and weaken metal.
-
Replace Bolts During Scheduled Maintenance: Proactively replace shoulder bolts showing any damage or excessive wear during routine grill servicing to prevent failures.
Implementing these practical maintenance steps will significantly increase shoulder bolt longevity and keep your commercial grill operating safely and efficiently.
Check out this guide on effective ways to clean your grill grates to prevent grease buildup, helping extend the life of your commercial grill bolts.
Conclusion
Properly replacing shoulder bolts is vital to maintaining the safety, performance, and longevity of commercial grills. By understanding the signs of wear, selecting the right bolts, following safe replacement steps, and practicing regular preventive maintenance, chefs and kitchen staff can ensure their equipment operates reliably with minimal downtime. This guide equips you with the essential knowledge and practical tips needed to confidently handle shoulder bolt replacement, keeping your commercial grill in top shape for consistent, high-quality cooking.
FAQ's
What is the purpose of shoulder bolts?
Shoulder bolts, also known as shoulder screws, are designed to support the rotation or sliding motion of parts, such as hinges or moving components in grills. They provide a precise bearing surface while securing components in place.
What is the difference between shank and shoulder bolts?
A shoulder bolt has a smooth, precision-machined section (the shoulder) that extends beyond the threaded part, allowing movement or alignment of parts. In contrast, a shank bolt typically has a partially threaded shaft without a defined, machined shoulder.
How to specify a shoulder bolt?
To specify a shoulder bolt, you need to know the shoulder diameter, shoulder length, thread size, and material. It's also important to match the bolt type with the application’s load and temperature requirements.
What is the tolerance of a shoulder bolt?
The tolerance of a shoulder bolt refers to how precisely the shoulder diameter and length are manufactured, often within ±0.001 inches. This tight tolerance ensures proper fit and function in mechanical assemblies.