The store will not work correctly in the case when cookies are disabled.
We collect user information to provide a better user experience and protect the security of our website. By continuing to use our website, you acknowledge the use of cookies.
Faulty Kitchen Sink Drain Parts: Step-by-Step Guide on How to Replace
Faulty Kitchen Sink Drain Parts: Step-by-Step Guide on How to Replace
Posted:February 18, 2025
Faulty kitchen sink drain parts are becoming frustrating problems for commercial restaurants. Whether it’s leaking water, slow draining, or emitting bad odors, a clogged drain can spoil your kitchen's working area. However, replacing sink drain parts simply with DIY tasks can save your time and expense of hiring a plumber without any headache. In this article, we will guide you through the process, giving you useful knowledge about understanding the various drain components, troubleshoot common issues, and provide tips to help you maintain your sink to prevent future problems.
Before starting any replacement work on faulty sink drain parts.Learning about the essential components of a kitchen sink drain system becomes vital. An understanding of all components will enable you to locate problems and successfully replace essential elements of your drain system.
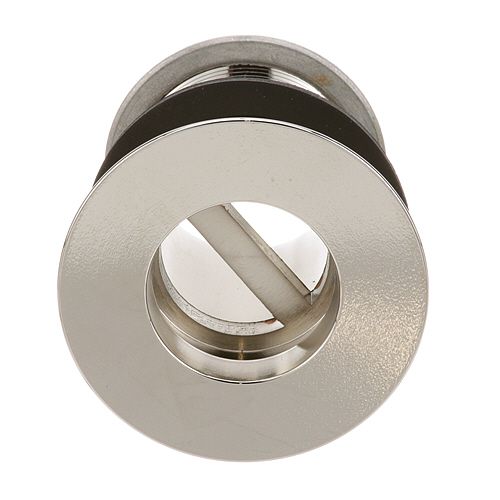
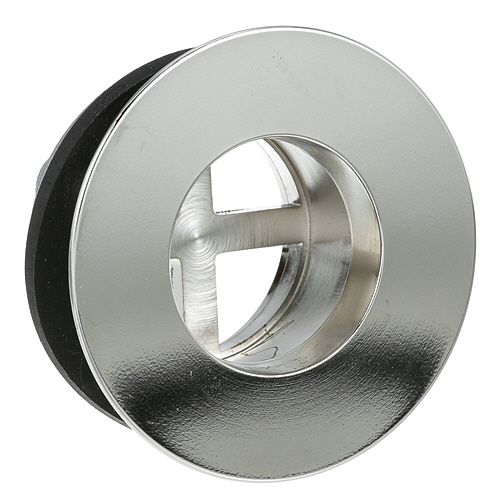
Drain Assembly: The drain system consists of the drain flange together with the strainer and washer. The drain flange and strainer work with the washer to direct sink water through the drainpipe while blocking foreign objects from getting inside.
Trap: A U-shaped pipe containing water functions as a barrier which stops sewer gases from entering your kitchen space.
Tailpiece: The vertical pipe connects drain assembly to trap for proper water flow in the system.
Drainpipe: The pipe that supplies wastewater from your sink away to the main sewer line extends from the trap.
P-trap: The curved pipe section functions as a water trap to create a seal which prevents sewer gas from entering the kitchen space while permitting drainage.
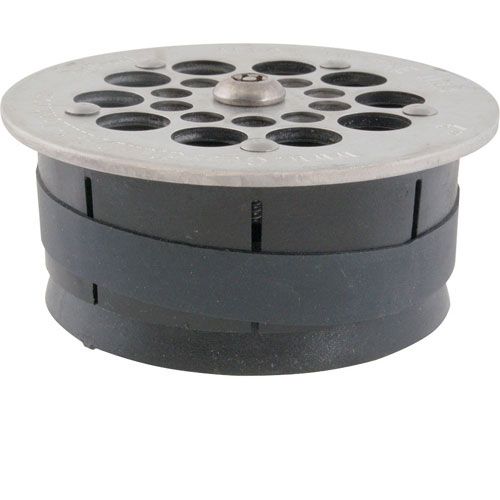
Strainer Basket: The strainer basket is placed at the bottom of the sink drain where it traps food particles and debris.
Vent Pipe: The vent pipe allows proper air circulation throughout the plumbing system to avoid pressure buildup.
Compression Coupling: Compression couplings can be used as pipe joining components that eliminate the requirement for soldering or welding procedures.
Understanding these components is essential for troubleshooting and replacing the suitable parts when problems are raised.
Looking for high-quality replacement parts for your kitchen sink drain? At PartsFe CA, we offer a wide range of durable and reliable kitchen plumbing parts from trusted brands like T&S Brass, Hatco, Cleveland, Winston, and Champion. Whether you need drain assemblies, gaskets, or pipes, we have everything you need to get your sink back in top condition. Shop with us today for fast, affordable solutions to your plumbing needs!
Common Signs of a Faulty Kitchen Sink Drain
A faulty kitchen sink drain creates multiple problems that affect your daily activities by causing drainage delays and leaking while producing unpleasant smells. Detecting these well-known indicators of drain failure at an early stage enables you to start resolving the issue before it deteriorates further. The following signs indicate your sink drain parts requires replacement:
Slow Drainage: The main reason behind slow drainage is pipe blockages which develop from food scraps and grease and mineral buildup. The accumulation of materials will eventually create a complete blockage that reduces water flow. Addressing slow drainage at its early stage remains essential to prevent worsening blockages in the pipes.
Leaks: The presence of water leakage near sink drain components indicates that either the gasket has deteriorated or the connections have loosened or the pipe has developed a crack. A minor leak that goes untreated will cause major water damage to occur beneath the sink.
Unpleasant Odors: The accumulation of food particles and grease inside pipes produces foul odors that come from the kitchen sink drain. The materials decompose into foul smells. The debris in the pipes will lead to unhygienic conditions if left untreated.
Frequent Clogs: Clogging signals are a fundamental problem affecting your drainage system since your traps or pipes have weakened or are outdated. These clogs will become more difficult to remove and create continuous issues.
Gurgling Sounds: Drain gurgling sounds indicate either a blocked vent system or partial pipe clogging. The trapped air causes disruptions that produce these sounds during water flow. Neglected gurgling noises from your sink drain might lead to reduced drainage efficiency.
Essential Tools and Materials for Kitchen Sink Drain Replacement
The success of kitchen sink drain parts replacement depends on having proper tools and materials. The right equipment makes the replacement process both faster and simpler. The following list contains all necessary tools and materials for the project:
Safety Precautions Before Replacing a Kitchen Sink Drain
Before starting the kitchen sink drain parts replacement, safety guidelines need to be followed to prevent accidents and damage. The safety measures you follow will protect you from harm while maintaining an efficient replacement operation.
Turn off the Water Supply: The first step for any repair work requires shutting off the water supply to prevent leaks or flooding. The water supply must be shut off to prevent any water flow during your work on the sink and pipes. The step of shutting off the water supply protects your kitchen area from potential water damage that can occur during the replacement work.
Wear Protective Gear: Protective gloves and goggles serve as essential safety equipment when you replace a kitchen sink drain. Gloves provide protection for your hands against both sharp elements and chemical contact and your eyes receive defense from flying debris or substances by wearing goggles. The safety measure of wearing gloves and goggles protects you from harm during the entire repair process.
Place a Bucket or Pan Under the Sink: The process of disconnecting pipes leads to water leakage which creates a messy situation. A bucket or pan positioned under the sink will collect any water that escapes during the work. A bucket placed under the sink during pipe disconnection will prevent workspace damage and keep the area clean.
Ensure Proper Ventilation: Drain sealants along with cleaning chemicals produce powerful smells and chemical fumes. The repair process requires proper ventilation to avoid breathing in dangerous vapors. The circulation of fresh air through window opening or fan usage maintains safety conditions during your work.
By following these safety precautions, you ensure a smoother, safer kitchen sink drain gasket replacement, protecting both yourself and your home from possible risks.
Steps to Replace a Faulty Kitchen Sink Drain
You can begin the replacement process because you have all required tools and safety precautions ready. These instructions will guide you through the efficient replacement of your kitchen sink drain parts. This guide provides both an easy method to finish the job and protection against typical errors.
Step 1. Remove the Old Drain Assembly
Begin by using an adjustable wrench to loosen the nuts which secure the kitchen sink drain plumbing parts assembly. A pipe wrench should be used to remove stubborn parts. Place a bucket or towel beneath the pipes to collect any remaining water during the process.
Step 2. Disconnect the Trap and Tailpiece
Unscrew the nuts which join the trap to both the tailpiece and drainpipe. After disconnecting the trap you should remove it and check for any damage that could need replacement. Check the tailpiece for signs of deterioration or rust and perform a replacement if needed.
Step 3. Install the New Drain Assembly
Plumber's putty should be applied to the drain flange's edges to form a watertight barrier. Press the drain flange into the drain hole until it reaches the proper position. Use the nuts located under the sink to tighten them and fix the flange securely.
Step 4. Attach the New Tailpiece and Trap
Secure the new tailpiece to the drain assembly and trap by maintaining proper alignment. Use an adjustable wrench to tighten connections when building drain system components yet avoid overtorquing the nuts. Plumbing tape should be applied to threaded parts to achieve additional sealing if needed.
Step 5. Test the Drain
Check for leaks after you turn on the water supply to all connections. Check the drainage system by running water through the sink to verify both proper drainage and correct operation of the new drain.
Step 6. Clean Up
Clean the area while taking away all tools and materials that were used for the replacement. Proper disposal of old components alongside storage of additional materials for future maintenance should be followed by cleaning up your workspace to maintain organization.
Step 7. Inspect for Proper Alignment
The pipes and components must be correctly aligned while checking for any kinks or bends which may restrict water flow. Monotony in plumbing components causes drainage slowness as well as leakage formation. Make necessary adjustments to achieve a direct water pathway without any obstacles.
Step 8. Check the Vent System
A proper drainage system depends on the vent system to function correctly. A blocked vent pipe will produce gurgling sounds and slow drainage so you should inspect the vent pipe for any blockages. Clear all blockages to enable normal airflow through the system.
Step 9. Seal the Drain with Silicone Caulk
To enhance protection apply silicone caulk along the junction points between the drain assembly and sink. The application of silicone caulk creates a watertight barrier that stops leaks from developing. Use your finger to smooth the caulk while applying it to achieve a uniform finish.
Step 10. Monitor the Drain for the Next Few Days
Check the drain operation after installation for a few days to verify proper functioning. Check for leaks and inspect drainage speed while listening for abnormal sounds. Resolve all problems right away to stop additional harm from occurring.
Troubleshooting Common Kitchen Sink Drain Installation Issues
Installation problems can still emerge even when preparation steps are followed properly. Knowledge about typical issues alongside their resolutions enables quick troubleshooting and resolution of installation problems. The following section outlines standard installation problems together with their effective resolution methods.
Troubleshooting steps:
Leaks Around the Drain Flange: Plumber's putty leaks when it is either insufficient or improperly distributed across the surface. The solution requires drain removal followed by surface cleaning before applying a thick layer of putty. Reinstall the drain after tightening the nuts to achieve a secure seal.
Slow Drainage After Replacement: The drainage system may operate slowly because of pipe blockages or incorrect alignment between new components. The inspection should verify that pipes contain no debris nor clogs and all components remain properly connected.
Strange Noises: The gurgling sounds from your sink suggest a problem with the vent pipe because it might be blocked or obstructed. The solution requires checking the vent pipe for blockages before cleaning it to restore proper airflow. Clearing the vent allows the drain to operate without producing unnecessary sounds.
Double-check Connections: Check that all nuts and pipes are tightly fastened before concluding the installation process. Water damage and leaks occur when connections become loose. The proper tightening of these components maintains both leak prevention and operational efficiency of your system.
Inspect the P-trap Regularly: Debris accumulation in the P-trap will eventually cause drainage problems such as clogs and reduced flow. Regular cleaning of the trap by removal will help maintain its free state from buildup.
Avoid Pouring Grease: The practice of disposing grease through sinks creates severe pipe blockages because the grease turns solid inside the plumbing system. It is essential to place grease in a dedicated container before discarding it properly.
Tips for Maintaining a Healthy Kitchen Sink Drain
After replacing damaged kitchen sink components you need to maintain your kitchen sink regularly to stop new problems from developing. Periodic checks accompanied by drain cleaning help to maintain a smooth operation of your kitchen system. Regular proactive measures stop sink breakdowns and ensure the sink maintains its proper condition.
Regularly Clean the Drain: Regular cleaning with baking soda and vinegar mixture prevents drain buildup so you should perform this procedure every few weeks. Baking soda and vinegar mix helps break down grease and food particles while maintaining pipe clearness. Regular cleaning procedures help maintain smooth drainage in the sink.
Use a Drain Strainer: Drain strainers act as a filter system to trap food particles and debris that attempt to enter the pipes. The simple tool functions to decrease pipe clogging which simplifies maintenance procedures. Regular cleaning of the strainer will help it continue to perform its intended function.
Check for Leaks: Regular inspections of the leaking kitchen sink drain connections and pipes should check for any leaking signs. Small leaks will grow worse with time until they create water damage. Early replacement of worn seals combined with proper connection tightening will prevent future problems from developing.
Flush with Hot Water: Hot water flushing the sink pipes once per week helps break down trapped grease and food matter in drain lines. Regular hot water rinses help maintain clear drains by stopping the formation of clogging materials. The hot water stream effectively removes soap scum from the pipes to maintain proper drainage.
The kitchen sink pipe replacement becomes essential when drainage problems persist because it helps repair damaged or corroded pipes to achieve normal water flow.
The process of replacing kitchen sink drain components appears challenging at first but becomes achievable when you have proper tools and basic knowledge. Your kitchen's functionality will return after you understand drain system components and commercial sink drain parts and learn to identify problems and correctly replace the drain. Regular maintenance investments promise both long-term preventative care and top operating efficiency of your faulty sink system. Maintaining your kitchen sink drain will help you prevent both the inconvenience and financial burden of hiring a plumber. Happy repairing!
FAQs
How do I replace a sink drain gasket?
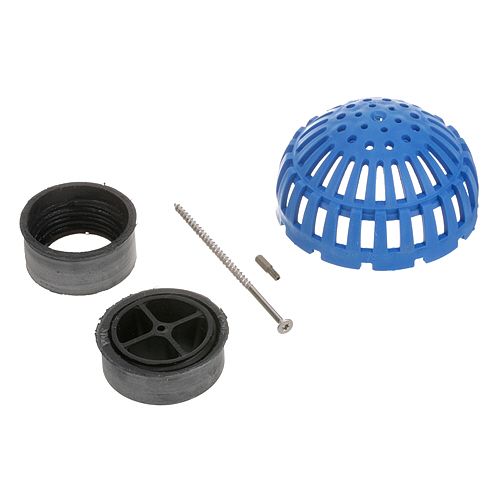
Replacing a sink drain gasket involves removing the old gasket from the drain assembly and cleaning the surface. Install a new gasket, making sure it fits securely, then reassemble the drain parts to ensure a tight seal and prevent leaks.
Can I repair a kitchen sink drain myself?
Yes, many kitchen sink drain repairs can be done DIY, especially if you have basic plumbing tools. Tasks like unclogging, replacing gaskets, or tightening connections are straightforward, but more complex issues may require professional help.
Why does my kitchen sink drain slow and gurgles?
A slow draining and gurgling kitchen sink usually indicates a clogged drain, where debris like grease, food particles, or hair has built up in the pipe, obstructing water flow.
Why is there a leak where my drain connects to my sink?
A leak where your drain connects to your sink is usually caused by a loose or improperly fitted connection, often due to worn-out washers or gaskets